Pages

Powered By Blogger

Friday 19 April 2013

Techniques: Blush for your face shape

I'm an absolute blusher addict, I've even been nicknamed the 'patron saint of blush'. I want to show you how to apply your blush to suit your face shape and make you look your most beautiful, by softening angular faces and lengthening rounder ones.
Start by identifying your face shape. Oval faces are often considered the ideal face shape, with prominent cheekbones and a forehead that is slightly wider than the chin. Heart shaped faces have a wide forehead and high cheekbones, and the face tapers to a narrow chin. Square faces have a forehead that is roughly the same width as the cheekbones and chin, while round faces are as wide as they are long.

Face chart - blush for face shapes

How to apply your blusher:

Oval faces - sweep your blush over your cheekbones. You can easily find your cheekbone with your fingers - aim to place the colour just above the bone rather than towards the hollow beneath it to help raise the height of your cheekbone.
Heart shaped faces - because your face can appear pointy, we need to soften the edges so it appears more like an oval. Apply blush to the outer corner of your cheekbone, starting by your ear and ending at a point below the outer corner of your eye. Also add a touch of colour by your temples, towards the centre of your forehead, to help balance the width of your forehead with your chin.
Square faces - your cheekbones are the same width as your chin, so to help define them apply your blush slightly below the cheekbone. Blush in the hairline will help soften the edges of your face.
Round faces - try not to use pearlised or highly reflective blushers as these reflect the light well and make a surface appear more round, which we want to avoid - matte blushers would be best for you. Sweep your blush from the ear down the cheekbone towards the mouth. Add a little touch of blush to the chin and blend it well to make your face appear longer.

Blush For Your Face Shapes

faceshape!


Blush For Your Face Shapes 

Most people can apply blush to the apples of the cheeks (that's the bit that sticks out when you smile).
Applying blush to the apples does work for most face shapes but for some of us we need to adapt the application to suit our face shape.
Let's take a look....

Long/Thin Face 
Long faces are narrow so to create an oval we need to broaden the face. This can be done by applying blush to the apples and blending it out towards the ear. 
Careful not to blend upwards, we need to create an almost horizontal line across the face.

This technique will work on any face that wants to be broader.

Round/Square/Full Face
Round face shape or any face that is on the full side will want to use this type of application to lift the face. 
Don't apply the blush too close to the nose and sweep upwards, avoiding the apple of the cheeks as this can make the face fuller. 
By sweeping upward you create a lift that thins the face. 
Doing the "duck face" helps!
Heart/Inverted triangle/High Cheekbones
These shapes all have great cheekbones, for that reason you want to avoid applying blush too high and instead apply it slightly lower than the cheekbones.
You can apply a small amount on the apple and blend it out but remember to leave a gap at the cheekbones.


Blush application is the easiest way to add dimension back to your face after you applied foundation. If done correctly, you can create much needed depth and even sculpt your face. Applied incorrectly, you can easily add 10 lbs to your face in seconds.  Let’s breakdown application by face type:

Round Face
 
 
If your face is round, more than likely you will want a more sculpted look. If you add blush to the apples (the highest point) of your cheeks, you will instantly add more weight to your face. Why? The color will create a “shadow” effect, creating more dimension on the widest part of your face…which is the total OPPOSITE of what you want. Instead of the apples of your cheeks, apply the blush following your cheek bones, in a 45 degree angle.


Oval Face


This is the most ideal face type due to its symmetrical nature. To get the most flattering look from your blush, you will need to use our cheekbones as a guide for product placement. Use your fingers to feel around your cheek until you have found the most prominent part of your cheekbone. Usually, this will be slightly below the apples of your cheek, about half an inch away from your nose. Apply the blush from that point in an arc, or crescent moon shape up towards your hairline.

Long Face
 
 
Someone with a long face wants to add or create the illusion of width. To achieve this, apply blush directly to the apples of the cheeks and extend the blush outward towards your ears. Next, sweep your blush across the middle of your forehead and along your chin line. This effect will shorten your long face.


Square Face


Soften the angles of your cheeks by applying the brighter color blush on the apples of the cheeks then sweep the blush towards your temples. This causes the eye to look up, taking away from the sharp angles of a square face shape. You can also contour to round your jaw line, by lightly dusting some blush from your chin to just below your ears.

How to Apply Liquid Foundation

How to Apply Liquid Foundation

Liquid foundation is one of the ficklest products to apply. Ever. Not only is its basic application a chore, but even after you feel like you have a routine down, the smallest hiccup — anything from product buildup on your brush to a stray brush stroke — can throw off your entire look for the rest of the day.
But after years (literally, it has been that long) of trying different methods, brushes, and foundations, I think I finally have it down to a handful of simple steps that can make all the difference in the world.

1. Grab your favorite liquid foundation

Grab your favorite liquid foundation. Now, I almost always choose a full coverage one, as this method will sheer it down a bit, making it suitable for most skin types and needs. Pour or pump an amount about the size of a nickel or quarter (this will vary depending on the condition of your skin) onto the back of your hand or a palette.

2. Take a dense, flat-top brush

Take a dense, flat top brush (my favorite is the Sigma F80), and dip it into the foundation. Dot this onto your nose, the cheeks, around the borders of your face, and your chin (one “dip” should pick up enough product to lightly dot around all of these areas).
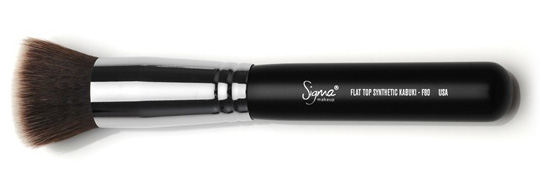
Sigma F80 Kabuki Brush

3. Starting at the nose…

Starting at the nose, stipple in small, tight areas, moving to the cheeks and the borders of the face, stippling product inward towards the center. Repeat this process for your chin.

4. With what is left on the brush…

With what is left on the brush, stipple over the area above your lips and below your mouth. Avoid the area where you get smile lines for now (this will look weird, but we’ll correct this malfeasance later.
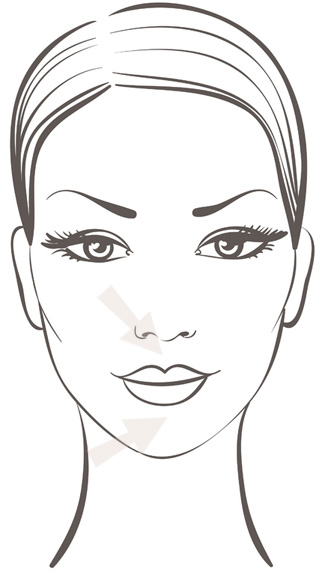
5. If you regularly use foundation under your eyes…

This next step is only if you regularly use foundation under your eyes, rather than or in conjunction with concealer. If you don’t, skip to the next step. Take a bit of foundation on the outer edge of your brush, and dot lightly under the eyes, concentrating the product at the lower inner corners where your undereyes are darkest. Stipple lightly over this area, taking the foundation applied under the eyes up and onto the eyelid and browbone.

6. Stipple across your forehead and into the hairline

You should have about 1/3 of the product left. Take some on your brush, and stipple it across your forehead and into the hairline (almost as bad as the jawline is a blatant change in color at your hairline, which many people tend to neglect). Your entire face should now be covered (except for the small area around your smile lines).


7. Dot under your jawline

Take the remainder of the product on your brush, and dot it under your jawline. Stipple this upwards to “connect” with the product on your face, and downwards slightly to fade it into your neck. Stipple lightly where your ears connect to your face.

8. Stipple all over your face

Stipple all over your face, using any excess product to deal with problem areas. This distributes the foundation evenly. You may now go over your smile line area, which will only be covered with a small amount of product, greatly reducing the chance of creasing.
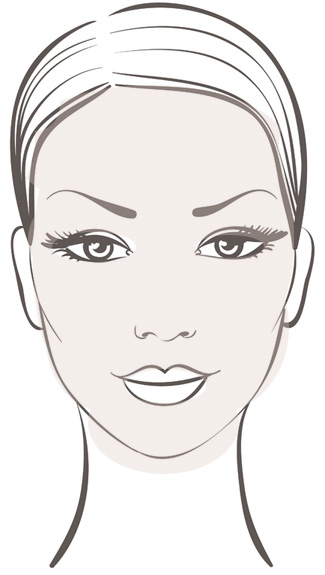
9. Buff in a circular motion

After you have stippled all over your entire face once, lightly buff in small circular motions using the same brush. This blurs imperfections and removes any excess product, and melds the product with your skin, giving it a natural skin-like texture. Make sure to buff under your eyes, over your eyelids, and around your hairline to blend the product into the tight borders surrounding these areas. Keep buffing until the foundation starts to feel a bit tacky (it usually takes 2-3 passes over my entire face and under my jaw to get to this point).

10. Apply any cream face products now

Apply any cream face products (blush, highlighter, contour, etc.)

11. Let your foundation set

This step is crucial. Let the foundation set for 3-5 minutes. Take a tissue, and blot all over your face, avoiding the nose if you have large pores. Pay special attention to the eyelids, lines under the eyes, and the corners of the eyes (where excess product will definitely have creased and collected). If your foundation tends to set into your smile lines, you may wish to buff very lightly over this area once more using the same brush as before.

12. Apply loose powder with a puff

Apply loose powder with a puff, rolling and pushing it into the skin.

13. Finish with any other powders and blend

Apply any other powder products (blush, bronzer, contour, etc.), and blend well.
This may seem a tad complicated, but ignoring the setting times, this whole thing takes 5-7 minutes at most, and results in smooth, even, porcelain skin.
If you wish to sheer down this application even further, dampen your brush slightly before application to prevent excess product from being absorbed by the bristles. Make sure to always use a (relatively) clean brush for application (I tend to wash mine every 3-4 days) to avoid caking. And never forget to set and blot!
With this quick tutorial under your belt, you’ll always be able to put your best face forward.

The Right Foundation for your Skin Tone

Use the chart below to view example of different skin complexions and Tones 

                                                      Cool                        Neutral                          Warm        

Skin Tone Test

  • If you tan easily and do not burn, your skin's natural melanin (the pigment that gives skin its color) level is higher, and you most likely have a yellow-to-olive undertone.
  • Those who burn and either tan minimally or not at all have significantly less melanin, which results in a pink, bluish-red, or ruddy skin tone. In addition, look for telltale signs: a ruddy skin tone has obvious signs of redness or is one that tends to flush easily. Some neutral skin tones fall into this category, particularly if rosacea is a factor.
  • If a yellow (usually referred to as "sallow") tone is predominant, you'll notice that a foundation, concealer, or powders with too much yellow will make skin look worse, not better.
  • Olive skin tones tend to look somewhat ashen or gray, from the combination of the natural yellow undertone everyone has and the greenish hue that’s unique to olive skin of any depth.
  • Neutral skin tones are those with no obvious overtones of olive, sallow, or pink.
These categories hold true for all women, including women of color; your underlying skin color will always relate to one of these skin tones. You may have been told that you are a particular “season” and your wardrobe and makeup colors should be a specific undertone, either cool (blue or pink tones) or warm (yellow or sallow/olive tones). Unfortunately, the rampant misinformation surrounding skin tone can be misleading when it comes to choosing your most flattering makeup shades.

Shopping for Foundation

When you’re testing foundation shades, it is critical to identify your overall underlying skin tone and find a foundation that matches it. This can be tricky because your underlying skin color but that may not be what you see on the surface. For example, you may have a ruddy (red) or ashen (gray) skin tone on the surface but your underlying skin tone is actually slightly yellow to beige. You want to neutralize whatever overtones are present with a neutral- to slightly yellow-toned foundation, thus matching the skin’s natural undertone.
Why a slightly yellow undertone? Because skin color, more often than not, always has a yellow undertone: that’s just what the natural color of melanin tends to be. For the most part, regardless of your race, nationality, or age, your foundation should be some shade of neutral ivory, neutral beige, tan, dark brown, bronze brown, or ebony, with a slight undertone of yellow but without any obvious orange, pink, rose, green, ash, or blue. Adding those shades to a foundation is never flattering and can look obvious and contrived.
There are a few exceptions to this guideline: Native North American or South American women, a tiny percentage of African-American women, and some Polynesian women do indeed have a red cast to their skin. In those instances the information about neutral foundations should be ignored. Because their skin has a slightly reddish cast, they need to look for foundations that have a slightly reddish cast to them—but that’s only a hint of brownish red, and not copper, orange, or peach.

Regardless of which of these categories you fall into, trying foundation on and making it sure it matches your skin exactly (especially in daylight) is the best way to get a color that looks natural, not like you’re wearing foundation or, even worse, a mask.

Choosing Makeup Colors

Flipping through the pages of a fashion magazine is great way to determine which colors work best with your skin tone.
  • Redheads with fair to medium skin tones like Susan Sarandon, Nicole Kidman, and Julianne Moore tend to wear corals, salmon, browns, ambers, bronze, and other earth tones.
  • Blondes with fair skin to medium skin tones like Gwyneth Paltrow, Paris Hilton, and Kirsten Dunst favor a range of pink shades.
  • Brunettes with fair to medium skin tones like Julia Roberts and Jennifer Garner are often seen in light rose and soft red shades.
  • Women with dark brown hair and fair to medium skin tones like Demi Moore, Sandra Bullock, and Penelope Cruz wear more vivid shades of rose and cherry.
  • Black hair and deeper skin tones such as Halle Berry and Angela Bassett wear soft natural tones such as nude pinks, soft browns, and pale corals.
It is also easy to see that there are exceptions to the rule and as a change of pace all kinds of color combinations (not to mention changes in hair color) are typical. In other words, choosing color can be as diverse and versatile as changing your clothes. To be safe, stay with the basics listed above, but in truth, anything goes as long as it is worn in balance and the colors work together.


FOUNDATION FINISHES

Sheer, Dewy or Matte: learn what’s what and find your preference!

Sheer: Let the true you shine through! This softer finish is perfect for those who'd rather go bare. Works for normal and combination skin types.

Dewy: This fresh finish loves the outdoors and looks radiant and natural when hiking trails or setting sails, especially for dry and normal types. .

Matte: Matte is flat, but never boring. Try Clean Makeup, Oil Control for a sophisticated no-shine look that’s perfect for oily and combination types. Need to morph from dewy to matte in a flash? Powder your entire face with Clean Pressed Powder, Oil Control.

FOUNDATION MAKEUP TIPS AND TRICKS

SEASONAL UPDATE
Don’t wear the same foundation with a summer tan as you would in the winter. Skin color changes with the seasons, so your foundation should change, too.

TO BE PRECISE
For the most professional application, use your fingertips or a triangle sponge to apply foundation. Natural sea sponges don't cover evenly—save them for your bath. Instead, try foam wedges—the smooth surface strokes on evenly, the tapered edge blends make-up into tough to reach spots like corners between the eye and nose.

BRIGHT-EYED TIP
Use foundation on your eyelids even if you never wear shadow. It evens out the lid’s tone and instantly brightens.

THE BLEND TREND
Be sure to double-check your neck when applying foundation. To avoid a severe line where your makeup stops and your neck begins, start at the center of the face and blend outward, gradually applying with a lighter touch as you approach your neck and hairline.

SHAKE THINGS UP
If you are using a liquid foundation, always shake the bottle vigorously before applying.

FINE LINE TAMER
To smooth fine lines, normal to dry skin types should prime their skin with a primer like COVERGIRL and Olay Simply Ageless Primer. Primers moisturize and even skin tone for a smoother makeup application.

Thursday 18 April 2013

Hair Color Shades – A Selection Guide

When it comes to shades there are literally hundreds if not thousands of possibilities so it is wise to start by narrowing down your options.

Get started by finding your level

A hair color level chart ranging from 1 to 10
To kick things off, let’s start by selecting your level. This is how light or dark you want to go, and obviously a strong determination of whether you become a brunette or a blonde. Level 1 is the darkest and Level 10 is the lightest (however some cosmetic brands go up to Level 12).
As a general guide, Level 1 is black (reserved for the Goth kids) and Level 2 is typically the color found is most Asian/Indonesian hair. Levels 8 through 10 are the very lightest blonde (but remember to allow room for margin as every brand is slightly different). We are not concerned with tonality or shade here, just the lightness or darkness of your color.

Next step, pick your perfect tone

Ok, so you have chosen your level, the next step is to select your tone. This is how you tailor your color to your complexion and your wardrobe.
When it comes to tones you will have three options, cool, neutral or warm. Let’s say for example you have selected Level 4. You now have the choice of Level 4 cool, Level 4 neutral or Level 4 warm. Each of these categories will contain two or three specific shades so you can find the one that is exactly right for you.

The three options when it comes to tone:

A chart of the cool neutral and warm hair color tones
Cool tones have undertones of blues and greens, and are sometimes referred to as ash tones. They can be harder to see in darker levels, but at lighter levels they produce a champagne or icy blonde.
Neutral tones are a balance of warm and cool and do not fall heavily at either side of the line.
Warm tones have reds, oranges and golds as the dominant colors, represented in shades such as chestnut brown at a lower levels and strawberry blonde at the higher levels.

So how do you decide if you are cool, neutral or warm?

One of the best indicators of your perfect tone is your skin complexion and eye color

An understanding of tones is invaluable when it comes to color correction, for example if your neutral shade becomes ‘brassy’ you can select a shade with cool tones at the same level to balance it out.
There are some tonal selections which might initially seem confusing, for example ‘cool reds’ such as burgundy and merlot shades, these are called secondary pigments and are another means of subtly changing your color.

Understanding Hair color And Developers

http://2.bp.blogspot.com/-SWUXT-NVxC8/ULD9xUbw7uI/AAAAAAAABe0/nkmdHQ5WyrY/s1600/brown-hair-color-chart.jpgHave you ever been to a stylist to get your hair colored and had no friggin idea what she was talking about? Have you ever wanted a particular color and your hair came no where near that when you dyed it? Have you ever stood in a beauty store desperately staring at developers hoping the right one with just come off the shelf and land in your arms? Well I know I have, MANY times.
I honestly don't know how many times I've been disappointed that my hair color didn't turn out like the color on the swatch or box. I've stood in Sally's for what seemed like hours staring at developers hoping the right one would slap me in the face and say "You need me dumbass." That's why I'm writing this, to help just one girl like I was to understand hair color and developers.


Firstly, hair color starts off by identifying the level of your hair. By level I mean darkness/lightness. If your at a beauty supply, like Sally's for instance I remove the swatch from the shelf. (if you do it carefully it will pop back on.) If your going to a professional supply use a swatch book. Then hold it up against you hair and try to match it. If it matches that is the level of your hair.  Standard hair color levels are defined on a scale of 1-10. 1 is the darkest, blackest color and level 10 is the lightest, blondest color.  A basic scale would look like this.


Level 1- Black
Level 2- Darkest Brown                                
Level 3- Very dark brown
Level 4- Dark Brown
Level 5- Brown
Level 6- Light Brown
Level 7- Dark Blonde
Level 8- Medium Blonde
Level 9- Blonde
Level10- Light Blonde
 After you have established you current color level and desired level, you must decide which tone you would prefer. Tones are put into 3 standard categories; cool, neutral or warm. Tones are usually indicated with letters.  This is an example of tones

Cool Tones                               Warm Tones
A- Ash                                       C- Copper
B- Blue                                      G- Gold
G- Green                                   W- Warm
V- Violet                                    R- Red
                                                R/B- Red Brown
                                                R/O- Red/Orange


Tones are usually mixed in formulas to create that perfect shade. For example the color I recently used on my hair is a 5RR from Matrix. So what would that be??? Its a Level 5 which is a darker shade, and RR is red with a red undertone.  So if I went with a 8VR what would that be??? a Level 8 which is pretty light, and the color would be violet with a red undertone. Are you still with me? :P

Now picking the right developer is quite easy once you understand color levels. Developers mainly come in 4 volumes; 10, 20, 30, and 40. a 10 volume mainly deposits color into the hair. It doesn't lift color at all. if you are wanting to go darker than your previous color or just darker in general use 10 volume. 20 volume mainly deposits color as well. Volume 20 is also best for gray, resistant hair and is the most commonly used. 20 Volume lifts color by 2 shades, an example would be going from a level 5 color to a level 7. You would use 20.  30 & 40 have the most lift but can but rather harsh to the hair. 30 volume lifts 3 shades and 40 lifts 4 shades. so if I was going from a level 3 to a level 7 I would use a 40 volume. Now if it cannot be achieved with a 40 volume then you must use lightener aka bleach.
you cannot go from a level 3 to a level 8 without a double process.

10V- No lift/Deposit only- Dark colors
20V- Best for gray hair/ Mainly Deposits/ Lifts 2 shades
30V- Lifts 3 shades
40V- Lifts 4 shades
Lightener- To lift higher than 4 shades.
I hope this helped at least one person understand color and feel comfortable and confident choosing color. Sitting in my theory class learning this I felt like a total dumb ass for not being able to understand or putting 2&2 together for the longest time. My light bulb finally clicked on after 10 years of coloring my hair. lol

Hair Texture

Hair Texture

hair texture        Hair texture is the measure of the circumference of the hair strand itself. Professionals classify the texture of hair as being "coarse", "fine", or "medium".

       Coarse hair has the largest circumference, and fine hair has the smallest. Medium texture indicates a middle-range of the size of the hair shaft, it's considered normal and poses no special considerations regarding processing and chemical services.

       Coarse hair is stronger, for obvious reasons - it has more substance. However, coarse hair can also be harder to process, and can be resistant to haircoloring services, perming, and straightening. Fine hair, conversely, is often very easy to process, and can be over-processed easily and is susceptible to damage from chemical services.

       Hair texture varies from individual to individual, and can be different in separate areas of the same head. You may have coarse hair on the top of the head and fine hair at the nape of the neck. Race and ethnicity are irrelevant in determining hair texture, as coarse, medium and fine hair can be found among all racial and ethnic groups.


Hair type, texture and density

Type of hair
There are three types of hair:
* African Caribbean
* Asian
* Caucasian (European)
African Caribbean
Usually very tightly curled and often very dark, African Caribbean hair is almost kidney shaped when seen in cross section.
African Caribbean hair is easily damaged. Take care when using treatments, particularly chemical treatments.
Asian
Asian hair is often straight and has a tendency to be lank. It varies in colour from very dark to medium brown and can be thick and very strong. In cross section, it is round.
If you cut Asian hair very short, it can stand straight out from the head.
Caucasian
Caucasian or European hair can be straight, wavy or curly. It varies in colour from very dark brown to light blonde. In cross section, European hair is oval.
Texture
Hair can be:
* fine
* medium
* coarse
When we refer to hair as being 'fine', 'medium' or 'coarse', we mean that each hair is fine, medium or coarse. The texture of hair is determined by its circumference and the condition of the cuticle. Fine hair has a small circumference and a closed cuticle, coarse hair has a much larger circumference and the cuticle will be more open. This will lead to the hair being more porous.
The texture of hair can determine what looks you are able to achieve. If hair is naturally coarse or if it appears to be coarse because the cuticle is open and damaged, you will not be able to successfully achieve a smooth look.
The texture of hair can vary significantly according to hair colour and racial type (see also How hair grows).
Density
Density relates to the number of hairs on the head. A client with fine-textured hair may have many more hairs on their head than someone whose hair is coarse. The number of hairs on the scalp depends on many influences and varies enormously but average densities are believed to be:
* for natural blonde hair - 130,000
* for natural red hair - 80,000
* for natural brown hair - 100,000
* for natural black hair - 100,000

Hair Education: Hair Chalk


Hair Education: Hair Chalk


Hair-Chalk-361
KevukevuAdded by konjo doll
I'm pretty sure all of you have heard of chalk for the chalk board, but have you guys ever heard of chalk for the hair? That's right! They actually have something called hair chalk on the market! I remember when I first saw the thing I thought it was just plain chalk and people rubbed it into their hair. I did a little research and i found out that it's actually chalk specifically made for the hair.
Hair chalk is actually a very good alternative to messy temporary dyes but still allows for a pop of color. Best part is that it works on ANY hair color! Unlike semi permanent dyes where you need to bleach your hair light enough for the color to show up, you simply just rub the chalk on the hair and the color will show. As for washing it out? You simply just go in the shower and shampoo as your normally would and it will wash out. However, I have heard reports that on blondes, it can stain the hair a little more and it might take a few more shampoos to completely wash it out.
There are so many looks you can create with hair chalk! You can create highlights, ombres, and even rainbow hair!
How to use hair chalk:
  1. Make the hair damp and then rub the chalk.
  2. Dry with a hair dryer after you're finished.
  3. Finish with some hair spray so that it doesn't stain your clothes.
Hope you guys try this out!

Bleach: Friend or Foe?

o, you're looking to lighten your hair.  Say you want to go from black to blonde or even a brown to platinum
Blehch
KevukevuAdded by konjo doll
blonde. You try as much as you can to find a way to lighten your hair WITHOUT bleach. I mean, a bleach-free way to lighten your hair is always good thing, right? Well, sometimes there really is no way to reach our desired shade without bleach. In this article we're going to focus just on bleach and why it's a good/bad thing. Let's get started! What is bleach?
-- Well, bleach is pretty much a lightener. It is made so that it can lighten hair. Most bleaches claim to lighten the hair 5-7 levels. so, if you're looking for a drastic change, bleach is definitely for you. Usually bleach comes in 1lb tubs or little packets. They also comes in colors of white, blue, or purple. Most bleaches contain persulfates and harsh chemicals.
Does the color of the bleach even matter?
--Yes, it actually does! Whenever someone asks me about what bleach to use, you should always get one that is either blue or purple. Why? The color of the bleach can make a huge difference when it comes to the final outcome of the color. The color of the bleach actually tones the hair while it's lightening. Say you know your hair is going to pull orange, you would buy a blue toned bleach so that it can tone away some of the orange. Same thing going for the purple/violet bleach so that it can tone any yellow that can occur when lightening.
So, is bleach safe for my hair or . . .?
-- Personally, I believe bleach is a person's best friend. Sounds crazy, right? Well, it kind of is. You see, if used properly, bleach can actually be extremely helpful. There's so many videos out there with people explaining how to bleach hair and when you see the final results, their hair looks fried, damaged, and frizzy. The problem is that they don't take in to consideration the condition of their hair before proceeding to bleach. this is why I recommend you do a strand test or start small and keep a constant watch on the bleach. Remember that it's always better to start small when dealing with your hair. For example, if you use a 20 developer and it only got to the orange stage, you can always bleach it another time and get it to the yellow stage. This is much better than using a 40 developer and then finding out your hair did lift or barely lifted but it's way too damaged and dry now. Working gradually is always the best way to go.
But I heard bleach can destroy your hair.
-- True, it can. But like I said, you must handle it properly. It's usually recommended that you never use heat when dealing with bleach because in reality, it can actually make your hair fall out. However, this can only happen if you process the bleach with heat for the longest amount of time. So don't be alarmed if your stylist is using heat when bleaching your hair. This is because they have other clients other than you so they're crunched for time. Trust me, most stylist know what they're doing. But, if you have lots of time to spare, don't use heat! Only use heat when you're running out of time or if your hair isn't processing enough.
One of the most hardest things to do is to get black hair to the yellow stage. Actually, it's really easy to get the roots to the yellow stage because they have some heat already there to help them. But, it's always hard for the lengths. If it doesn't lift to the desired level all at once, be patient! It's fine! Do a second bleaching if you please. If you really don't want to bleach it another time in one day, wait a day and do it then. I personally wouldn't recommend bleaching your hair more than 3 times (it should have lifted to at least yellow by that point) The most time you should process bleach is 50 mins WITHOUT USING HEAT FOR THE FULL 50 MINS!
What signs do I look for to know if my hair is damaged?
-- The first thing is to see if your hair feels nice, soft, and silky when washing it out. This isn't necessarily a good thing. When your hair feels this way when washing it out, this means your hair isn't in good condition and you should be very careful if you plan to proceed with another bleaching process. Who knew soft and silky could mean dry and damaged? Also, if your hair starts to feel "gummy". This means the hair will stretch and it will feel really icky. This is EXTREMELY bad! You probably shouldn't continue if your hair feels this way. The worst case is if you processed the bleach with heat for the longest amount of time and your hair falls out. That's pretty much a no-brainer.
What do you do after bleaching?
-- Most likely you will have to tone your hair to get rid of any brassiness or do some highlights. Do not touch your hair approximately two days after bleaching. This part is crucial so that you can let the cuticle heal. Also, your hair deserves a good break after all those chemicals. Do not use heat or dye for about a week. Just let your hair rest! Wait two days, wash it if you want, and just let it air dry. Continue doing this for a week or two and then you can go back to your normal hair routine. It's just always best to let your hair rest after doing any processes that involve harsh chemicals.
So, what's the verdict?
--Bleach really isn't that bad! There's many common misconceptions that bleach is the WORST thing in the world and that it should never be used. Truth is, bleach is awesome! It gets your hair as light as you want that regular dyes can't do. I've gotten my hair bleached and so have my friends. None of us have gotten terrible hair or split ends. The worst thing was a little dryness which can easily be fixed with some deep condtioning. Just remeber that working gradually is the BEST way to go and the choice of bleach is very important. Always choose a high quality bleach and go to the salon if you're really unsure about doing it yourself. Also, make sure you're bleaching your hair properly! Hope this article helped! Please leave any questions or concerns in the comments section or correct any information you find wrong.
Happy bleaching!

Semi, Demi, or Permanent

Hello everyone! Merry Christmas! I hope everyone is having a wonderful Christmas and I wish you all the best! We survived the end of the world so I think it's proper that we celebrate! Haha. You can probably guess what I'm going to write about in this article. With so many different types of hair dye brands and colors in the market, choosing the right hair dye is already hard enough. You also have to worry about the type of hair dye when talking about how long it will last. This will help people who are confused about what type of dye to use for their hair based on commitment level. I will be using a number scale of 1-5 to show the level of commitment. With that said, let's get started!
Semi Permanent 1 2 3 4 5
This type of hair dye washes out the fastest out of all the three. They last about ten to twelve washes, but it can vary depending on how light your hair is. For example, if your hair is a level 8 blonde and your hair takes color very well, it can last up to a month. Sometimes this dye doesn't wash out completely depending on how light your hair is. This dye only deposists color and will not lighten your hair at all. There's no ammonia in this dye and it's barely damaging. I would recommend this for people who want to darken there hair or add more vibrancy to their natural hair color without the commitment.
Demi Permanent 1 2 3 4 5
Demi permanent color is almost the same as semi permanent dyes except for the fact that they last longer. Demi permanent dyes usually last about 28 washes and they are deposit-only dyes. This dye will not lighten your hair. This is also good for people who want to add vibrancy or go darker without the commitment. They are usually combined with 10 vol developer but I have also seen demi permanent dyes used with even less volume developers such as 9 developer. This means that you're putting a very small amount of peroxide in your hair and it will barely damage your hair. I currently have a demi-permanent dye in my hair and it really refreshed my color and added shine while also making my hair feel really silky. This type of dye can also be used as a toner and if you need to refresh a fading permanent color. Also use this if you're going to dye your hair unnatural colors such as pastel colors and or neon colors. There's also demi permanent dyes that are used to just add shine instead of color.
Permanent 1 2 3 4 5
As you can tell from the name, this type of hair dye lasts the longest out of the three. Permanent dyes are very universal in the sense that they have many different colors and they can be combined with either 10, 20, 30, or 40 developers meaning they can deposit or lift the hair color. Unfortunately, this is the most damaging dye, but it is not as damaging as bleach. I would recommend this for people who want to change their hair color to something lighter. For example, if you want to dye your level 3 dark brown hair to a level 6 light brown or level 7 dark blonde. Be aware that this color will last for months at a time and you will see a line of demarcation once your hair grows out. Because this dye is the most damaging, I usually tell people to dye their hair every 3 months rather than the recommended monthly touch up. Be sure you are ready for a commitment when using permanent dyes, especially when using black.
Bleach 1 2 3 4 5
Bleach is a completely different story when it comes to dyeing hair. The difference between bleach and hair dyes is that bleach strips the natural color of your hair permanently. Once you put bleach on your hair, you will never get your natural pigment back. I really do not recommend using bleach because it can be very damaging if you don't don't do it properly and if you don't have proper after care. However, if you really need it in order to reach a certain color, go for it. I've had my hair bleached and my hair is completely fine. It's a little dry but it just needs some nice conditioning and moisture treatments. Nothing major like massive hair loss or straw-like hair. Bleach can be used with 10, 20, 30 or 40 developer and it must be under watch constantly. Also, do not bleach already-bleached hair. Only touch up regrowth. This can also be used if you want to bleach your hair to a very light blonde in order to dye your hair colors like blue, pink, violet, etc. Make sure you are ready for a huge commitment when using bleach

Hair education: Hair coloring


Hi, everyone! It's been a while since I've contributed to this wiki and I think it's time for another article to help you guys out there that struggle with dyeing your hair. Let's get started!
  • Hair colors are divided into 10 different levels --
Level
Color
Underlying-Tone
10
Lightest Blonde/Platinum Blonde
Pale Yellow
9
Light Blonde
Yellow
8
Medium Blonde
Gold
7
Dark Blonde
Gold-Orange
6/6.5
Light Brown/Lightest Brown
Orange
5
Medium Brown
Red-Orange
4
Dark Brown
Red
3/3.5
Lightest Black/Darkest Brown
Dark Red-Brown/Red-Brown
2
Soft Black
Dark Red-Brown
1
Jet Black
Dark Red-Brown
This chart follows the levels that drugstore brands follow. This chart applies to the levels that this wiki follows seeing how all the hair dyes on this site are drugstore brands. Keep in mind that when using professional hair dyes, they don't follow the same levels that drugstore brands do. A Level 6 light brown to you could be a Level 7 dark blonde to professionals. Black is still considered a Level 1 but, Level 2 is considered darkest brown for professional hair dyes and the chart goes on from there. This chart is important for people who want to color their hair, especially for those who want to bleach their hair. Remember that not all hair will go through all ten stages of bleaching. Only those with black hair will, depending on the desired level.
  • Hair colors follow the color wheel chart --
Professional Hair Color WheelHair Color wheel.
KevukevuAdded by Kevukevu
There are different names for the undertones in hair dyes:
  • Ash -- Hair dyes that include the word "Ash" in the name typically means the hair dye is more cool-toned. They consist of green, blue and pale violet undertones. These cancel out any unwanted red, orange, brassy, gold, and yellow undertones.
  • Gold -- Gives nice warmth to the hair. Superior gray coverage. In some cases, it can turn brassy and become more of a red-orange undertone.
  • Copper -- enhances gold to orange undertones into a nice fiery copper tone.
  • Mahogany -- Neutralizes deep red to orange undertones into a nice cool red undertone.
  • Red -- Maximizes red to orange undertones to create beautiful red tones.
    • Chocolate -- These are polychromatic blends that take advantage of all primary and secondary tones.
Remember that all colors are made from three Primary Colors: Blue, Red, and Yellow. Equal portions of blue, red, and yellow will create a neutral color. Think of it as a math equation: Blue+Red=Violet+Yellow=? (look at the chart and apply it to the formula). So, what does it equal? A neutral color because yellow is right across violet on the color chart. Secondary Colors are colors that are made when you mix equal parts of primary colors. Blue+Red=Violet, Red+Yellow=Orange, and Yellow+Blue=Green. Colors that are right across from each other on the chart signify which colors cancel out each other. These are called Complementary Colors. Green cancels red, blue cancels orange, purple cancels yellow, etc. This color chart is very helpful when making coloring mistakes.
  • Hair has different characteristics to keep in mind:
Texture -- Diameter of the hair strand.
  • Fine Hair -- Lacks body, you barely feel the strand, very thin hair strand, lightens easily, and can turn out darker when depositing color
  • Medium Hair -- Has decent body, lightens fairly well, good when depositing color.
  • Coarse Hair -- Has great resistance to lightening and may have color end up lighter when depositing color.
Porosity -- How porous the hair is.
  • Porous -- Hair is dull, cuticle is open, easy to lighten but is prone to grab color and fade quickly.
  • Normal Porosity -- shiny, cuticle is intact, has average response to lightening.
  • Non-Porous -- tends to resist lightening and may need additional processing time.
Formation -- How the hair grows ex. Straight, Curly, Wavy.
  • Straight Hair -- Reflects more light.
  • Curly Hair -- Diffuses light.
  • Excessively Curly Hair -- May need a more intense tone because the hair is curling too much that it doesn't relfect light well and lessens the effect of the shade.
Different volumes of developer -- Developers are key tools when dyeing hair. They're pretty much the things that make the hair dye work! For those of you who don't know, the developer is the white cream that comes in every hair dye box.
  • 10 Volume -- For optimum gray coverage and for lifting one level/depositing.
  • 20 Volume -- The happy medium. This is the most common developer used in boxed dyes. It's used to lift the hair 2 levels.
  • 30 Volume -- This is usually used for people who wish to go 3 to 4 levels higher. Don't be confused when boxed dyes say a certain dye is "Hi-Lift". Hi-Lift pretty much means the boxed dye is using a level 30 developer. This is good for people with black, dark brown, and medium brown colored hair wishing to go to a light brown color. There are also Hi-Lift colors for dark blondes wishing to go light blonde/platinum blonde.
  • 40 volume -- This is the highest developer. This is used for when people want to go 4-5 shades lighter and when using bleach.
  • Bleach -- Bleach comes in the form of a powder. People usually chose a 20, 30, or 40 developer to mix with the powder when bleaching hair. Bleach is used to lift the hair 7+ levels.
Please keep in mind that volume 30, 40, and Bleach are very damaging to the hair. Just remember that the higher the volume, the more damage. This is why I highly recommend people only dye their hair every 2-3 months to prevent as much damage as possible and to condition well.
  • Semi-Permanent -- Semi-permanent hair colors are the ones that last the least out of any other hair dye besides the spray ones you get at the party store. They are used to deposit color and not to lift.
  • Demi-Permanent -- Demi-permanent hair colors last longer than semi-permanent ones but are not permanent. They will wash out eventually. These will lift the hair color around 1 level and is good for coloring grays.
  • Permanent -- These are used to lift the color to any level. They last the longest and are hardest to get rid of. However, they are the most damaging.
  • Toners -- Toners are pretty much non-permanent hair dyes that are used to fix colors. For example, say you bleached your hair to blonde but it turned out a little too yellow-ish and you want to get rid of it. You would use a purple toner to cancel out the strong yellow tone of the hair. Toners are usually combined with a 10 or 20 volume developer because you're only depositing color, not lifting it. Toners are very common for people wishing to go blonde because going from a level 1 to a level 8 will most likely result in brassiness and will need toning.
I really hope this article helps you guys out there! Please feel free to ask me any questions and leave any comments below. If you would like to add something helpful that I did not put in the article, go for it! :D